
So I posted the Thruster Cycle just recently and I felt good about it. After examining and looking at it I felt it needed a little more work. I got a little excited about what I was doing, but I did not stop to evaluate my layout. This post is how I went about self critiquing to make this a better piece. My point to this post is not only to push myself to improve, but to show others how to look at your own work and critique it yourself. It is very valuable to ask other people about your work, but you need to ask people that can give you good feedback. Don’t look for the friend or family member that is going to tell you it looks cool.
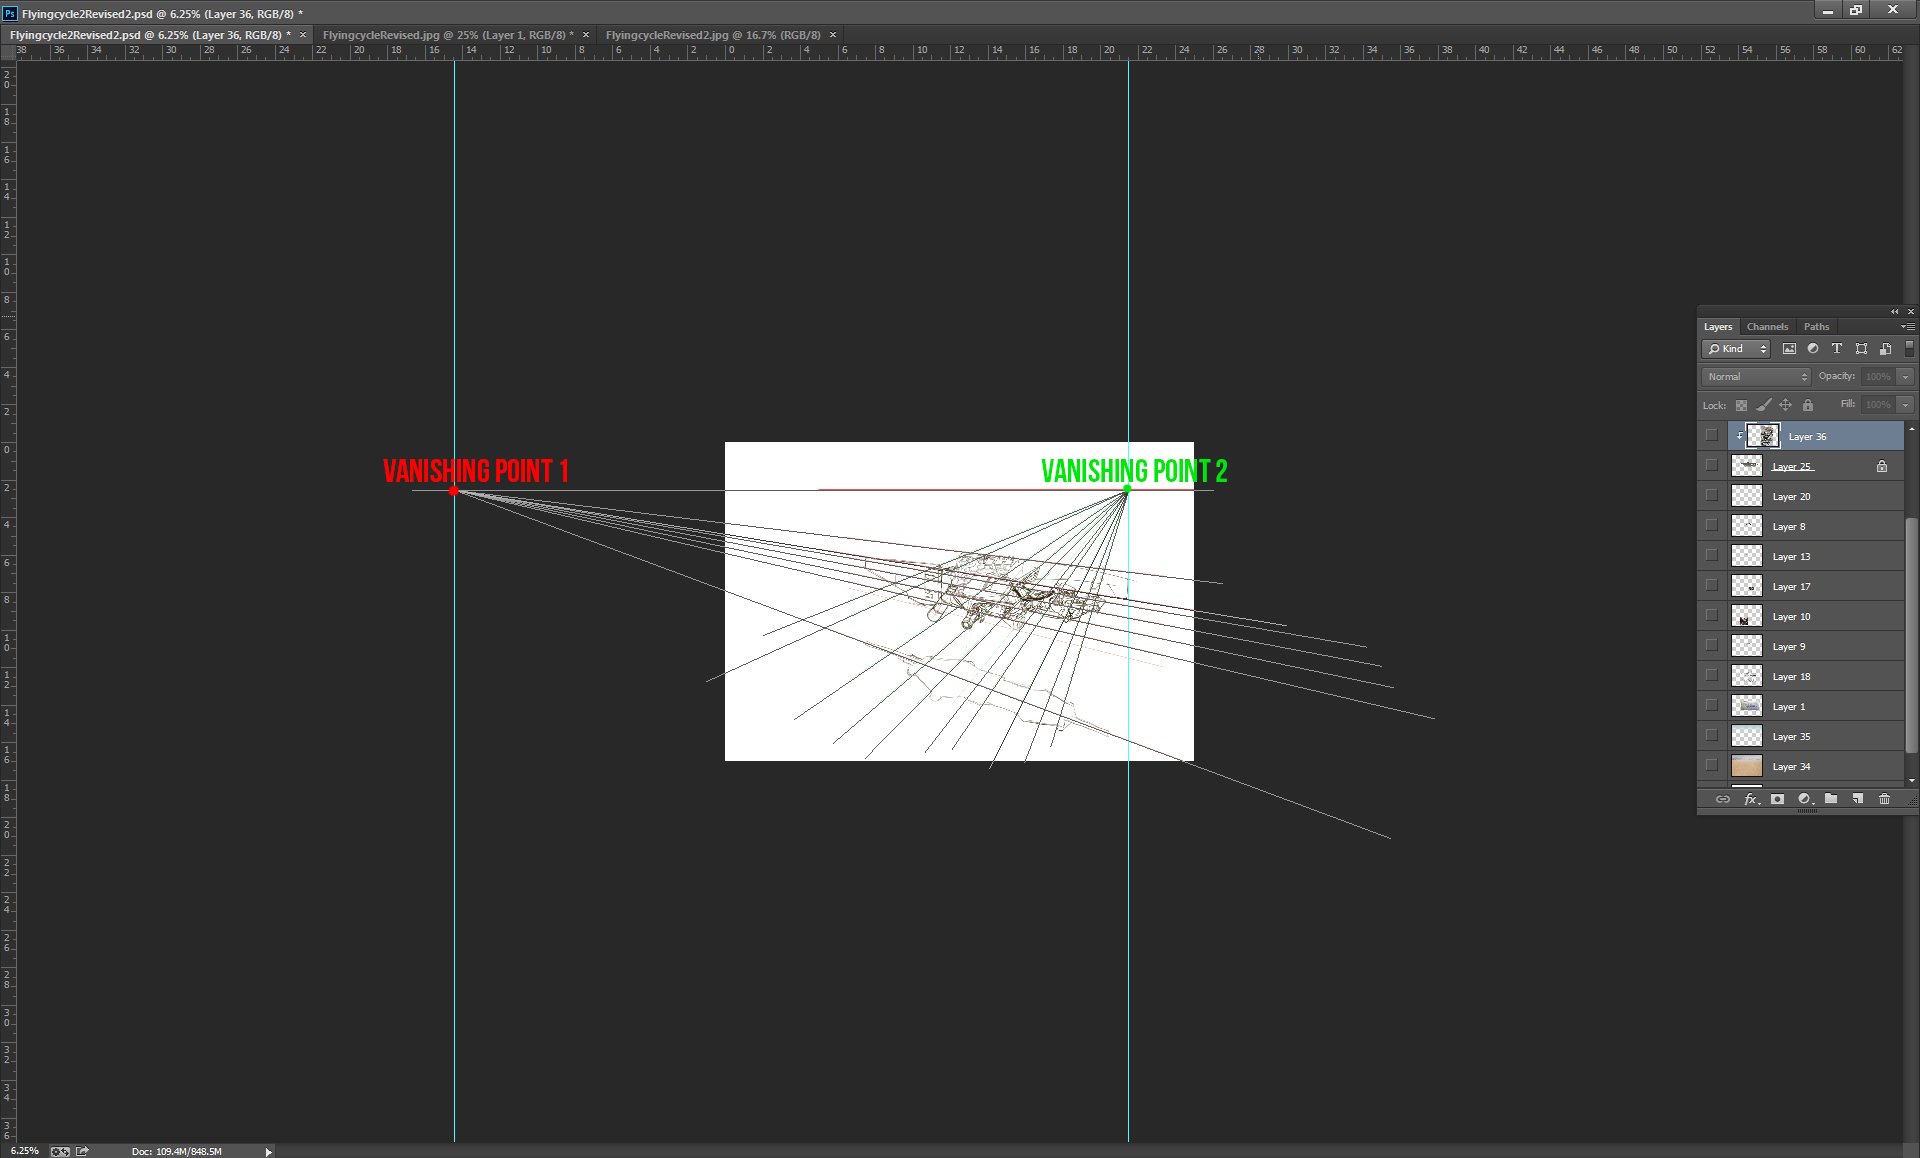
When I first approached the digital painting again I tried to treat it as if I had never seen it before. As if someone came to me and said “how would you improve this?” So I started checking my perspective and my background image. I put some notes on my original image so I can go back and take a look at each area of the image. To check my perspective I made my two vanishing points in Photoshop. Here are a couple images below showing how I corrected my perspective. Perspective is really a key element in making man made objects look solid and grounded. It can be tedious and boring but once you understand it, it will improve you work tremendously. It is a foundational skill that will make your work look more confident and grounded.
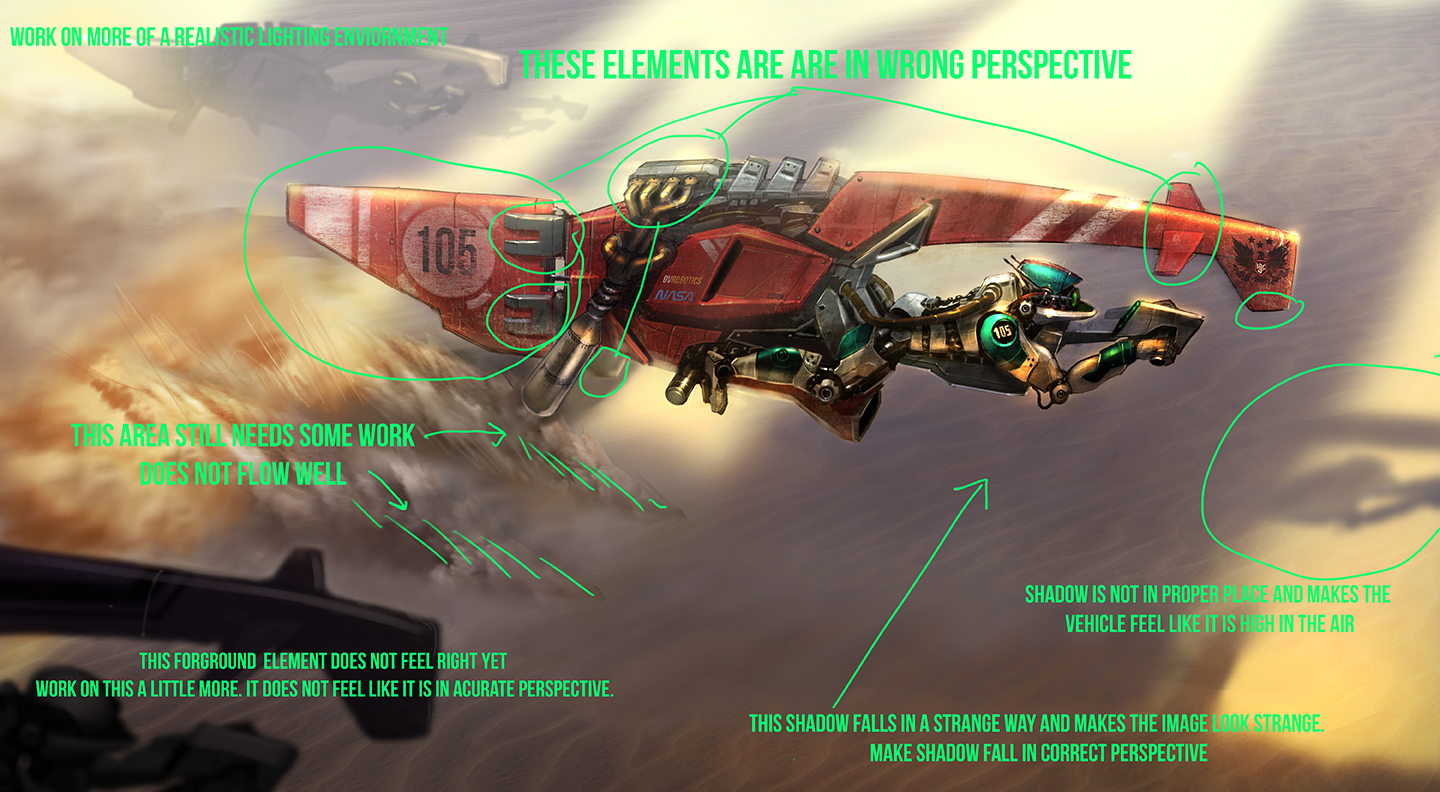
So to start I looked at my image and made a few quick notes. I was critical on the image and highlighted areas I felt were not working. Then asked myself why I felt they were not working. Took notes and started to address problems I could see. I went back to my original sketch and started to take care of the perspective issues. Some of the things could be left alone but I felt they weakened the design a bit. The main area I felt was weak was the back side of the engine as it drooped down in the back. Then the ground shadow under the bike was out of perspective. I did not use that final shadow in the final piece but it does set up my initial drawing and it was off.
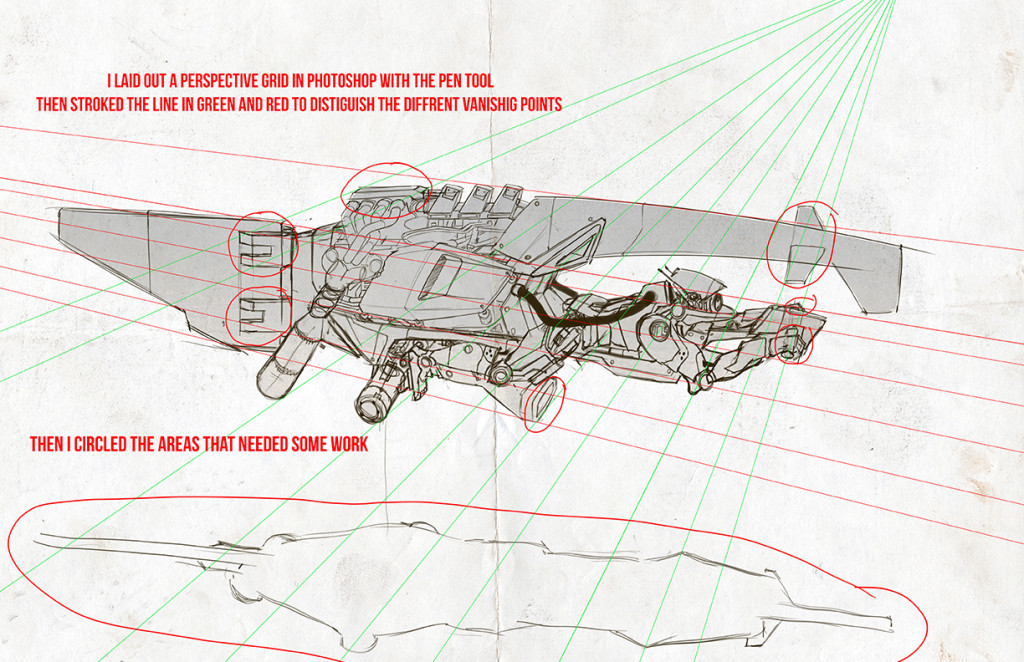
This image below is how I set up my perspective grid to fix my original sketch. Yes I should have done this in the first place, haha but hey i got a little excited.
Here is the image after I corrected the perspective issues

Now you can see after I fixed a few issues with the initial sketch it makes a more solid design. For the next post I will try a different rendering method and share that in part 2. If you have anything to add or any questions fill free to ask in comments below. Or you can visit my facebook page and ask me questions there. So keep drawing and learning, and if you dug this short tutorial please share it with others out there. With respect Dwayne Vance
Leave a Reply